
Installing a hardwired Watchdog
Before the transfer switch. Strip no more than 3/8 inch. Torque to 35–40 in-lb.
Not comfortable with wiring?
Have a qualified RV technician or electrician do this.
Where it goes
Install it before the transfer switch. Power from the shore cord should reach the Watchdog before anything else, so it protects the whole RV.
Steps (Gen II hardwired)
- Disconnect the RV from all power.
- Pick a spot inside the RV, out of the weather.
- Cut the main power cable.
- Strip no more than 3/8 inch of insulation from each wire. Use the strip gauge in the install guide. Longer can damage the unit.
- Connect each wire, matching input (from shore power) and output (to RV): G = ground (green or bare), N = neutral (white), L or L1 = hot (black or red), L2 = second hot (50A only).
- Tighten the set screws to 35–40 in-lb. Don’t overtighten.
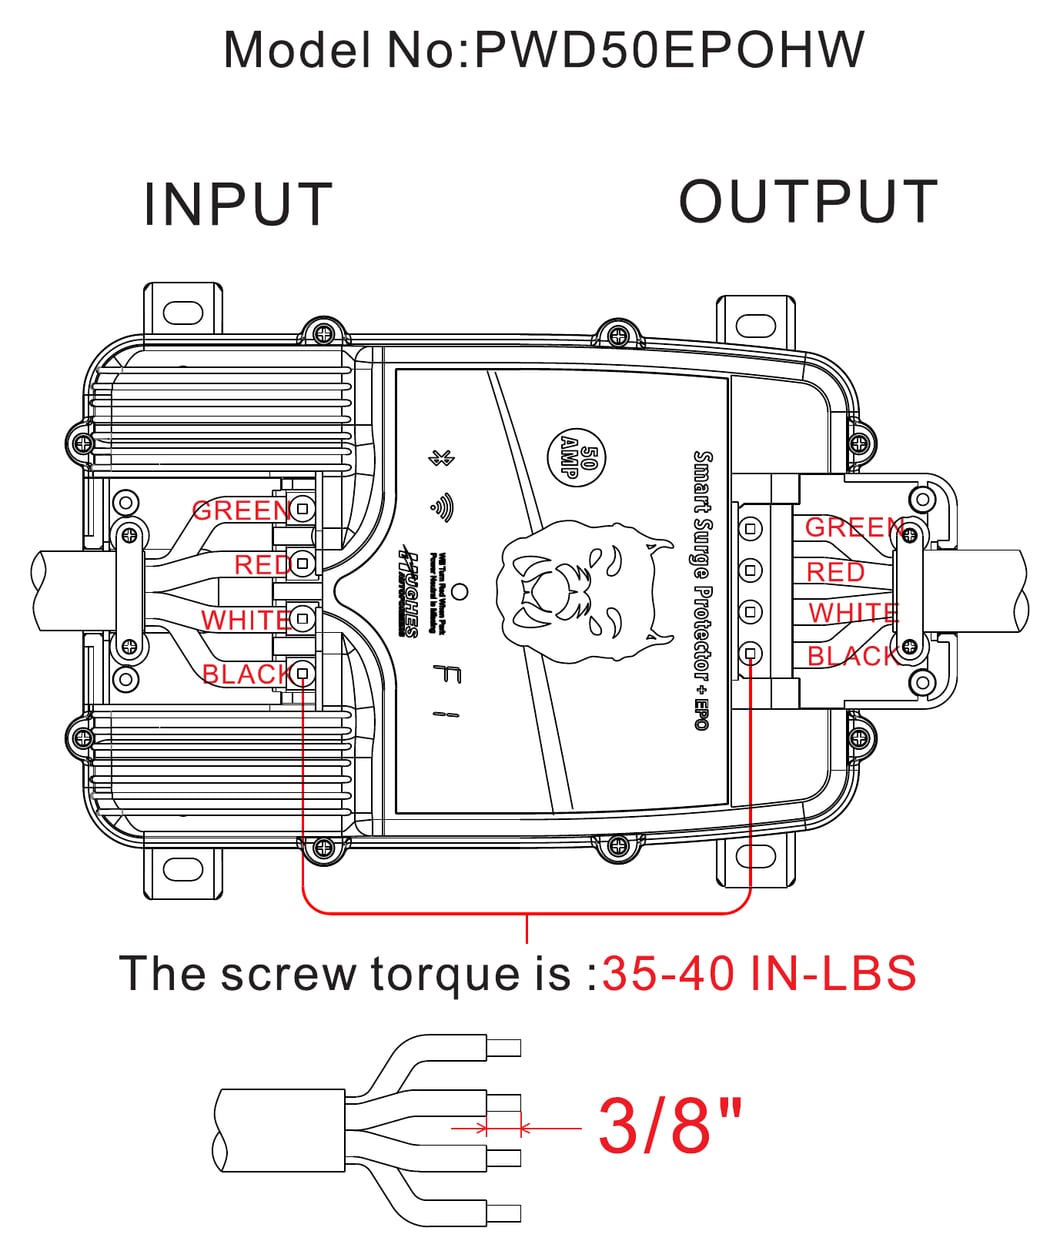
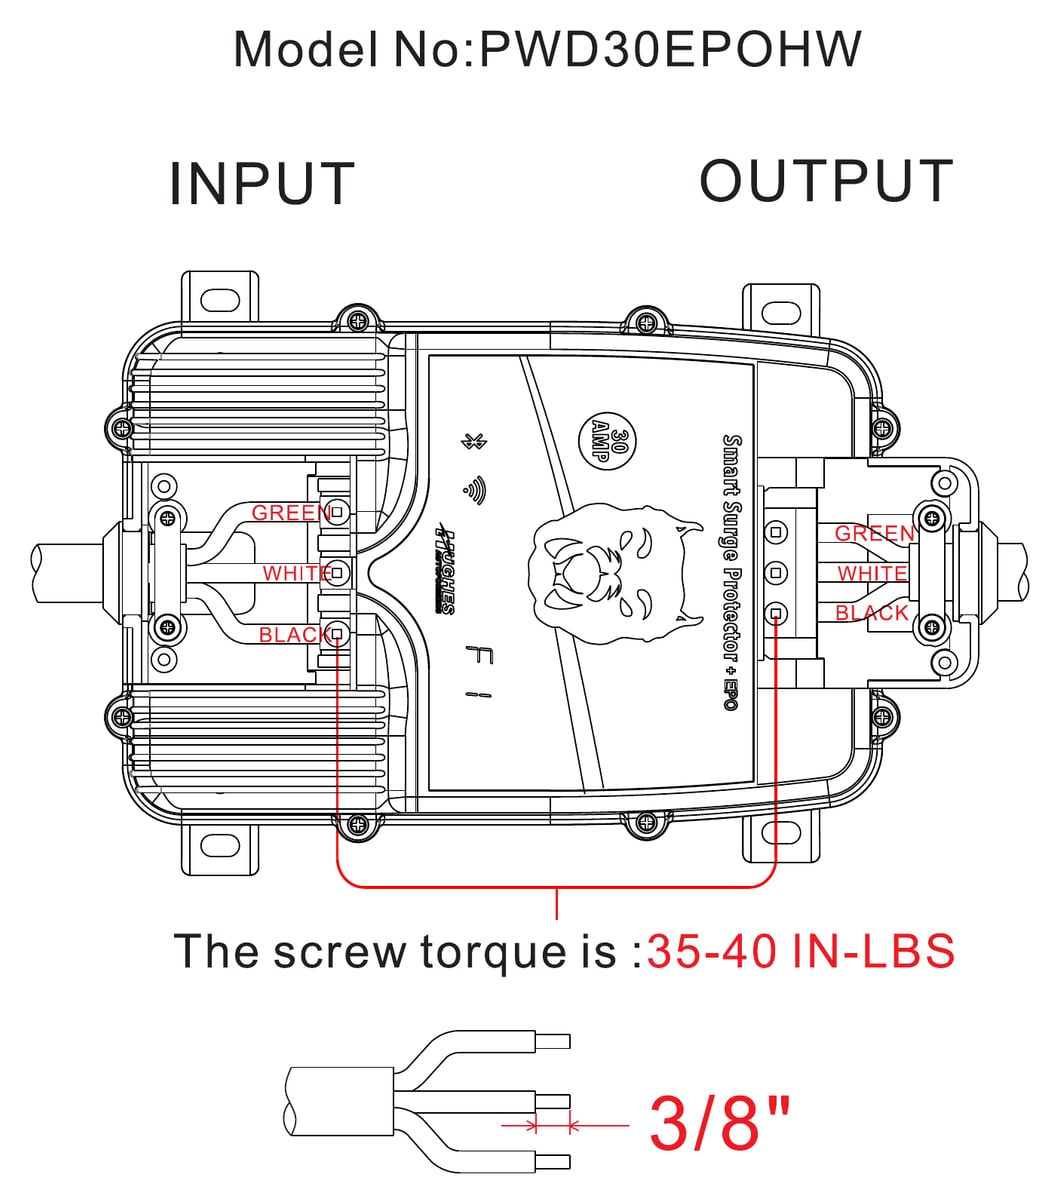
The full guide: Gen II hardwired installation guide.
Hardwired units mounted inside the RV can face any direction.
Did this fix it?