Do I need a new surge module?
Only when the unit tells you. Here's how to read it on each model.
Power cutting off doesn’t mean the module is used up. Replace it only when:
- Gen II, Gen I EPO and Power Center: the dog face stays red and E9 shows. The app alerts you too.
- Gen I (
PWD30,PWD50): the light(s) below the main 3 go out.PWD30has 1,PWD50has 2. Green means the module is fine.
Your RV keeps power with a used-up module, but it’s no longer protected from surges.
Gen II and Power Center owners: call (888) 540-1504 for a free replacement within the first two years. Shipping fees may apply to Canada, Hawaii and Alaska.
Which module do I need?
Find your model number, then order the module next to it. You’ll also find it on your product’s page under Parts.
| Your model | Replacement module |
|---|---|
PWD30 |
RSP30PWD |
PWD50 |
RSP50PWD |
PWD30-EPO, PWD30-EPOH |
RSP30PWDEPO |
PWD50-EPO, PWD50-EPOH |
RSP50PWDEPO |
PWD30W, PWD30EPOW, PWD30EPOHW, WPC30A |
RSM30W |
PWD50W, PWD50EPOW, PWD50EPOHW, WPC50A |
RSM50W |
Power Center modules are the same as Gen II modules of the same amps.
If the red light inside is on while you’re replacing the module, the unit still has power. Disconnect both the input and output wires first.
Replacing the module on a Gen I or Gen I EPO
Unplug the Watchdog from the pedestal and from your RV before you open it. For a hardwired unit, shut off its power first.
The steps are the same for every Gen I: portable or hardwired, with or without EPO. Only the module is different, so check the table above before you order.
You’ll need a Phillips screwdriver. These steps are from the Gen I surge module replacement guide.
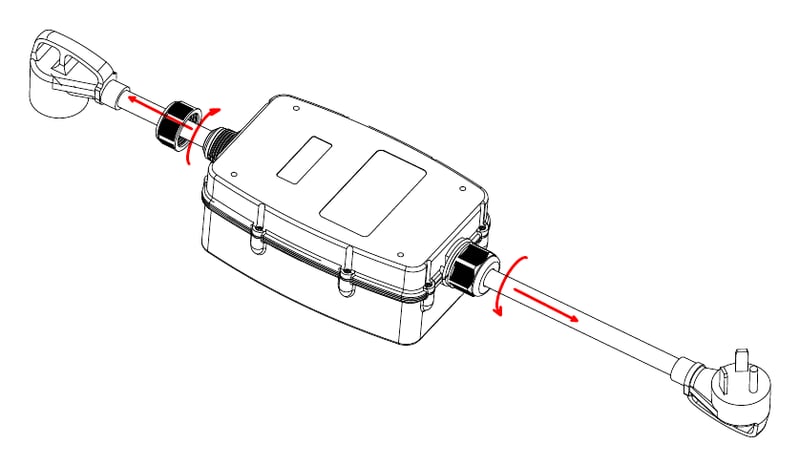
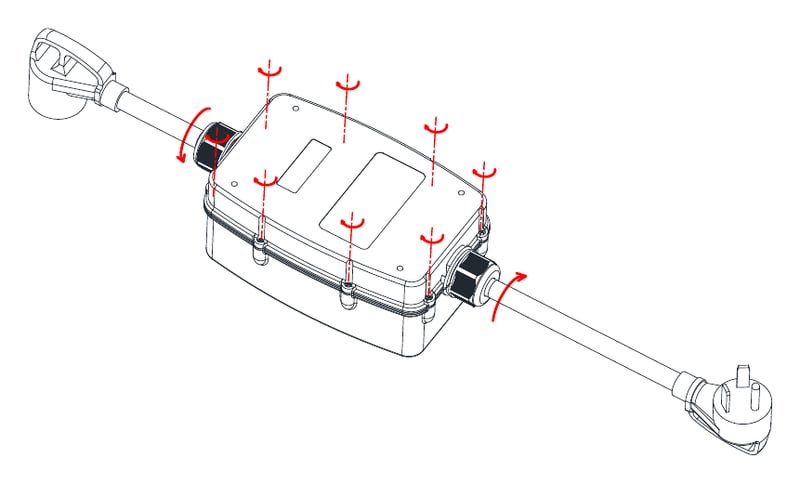
- Loosen and unscrew the cable connectors (glands) at the top and bottom of the unit.
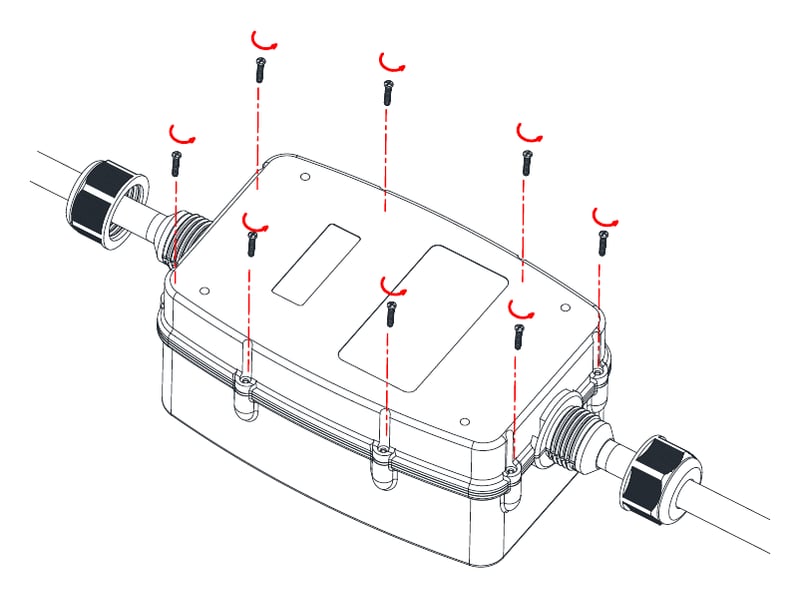
- Remove the 8 Phillips screws on the back.
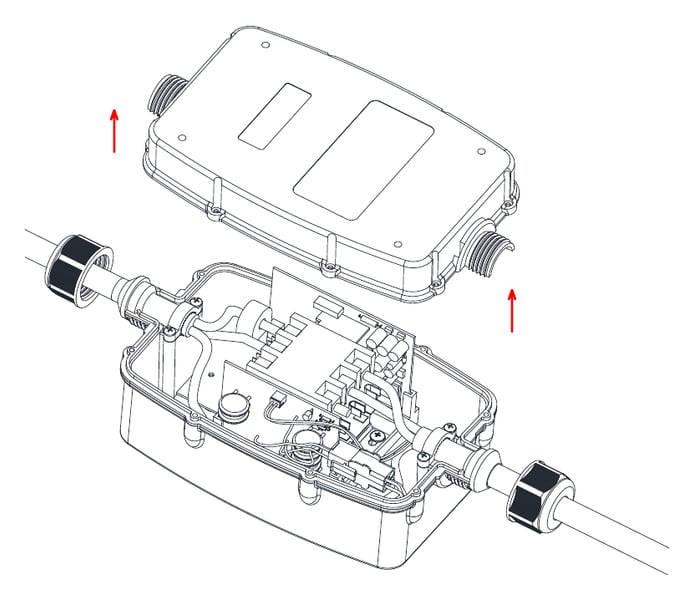
- Carefully separate the top and bottom halves.
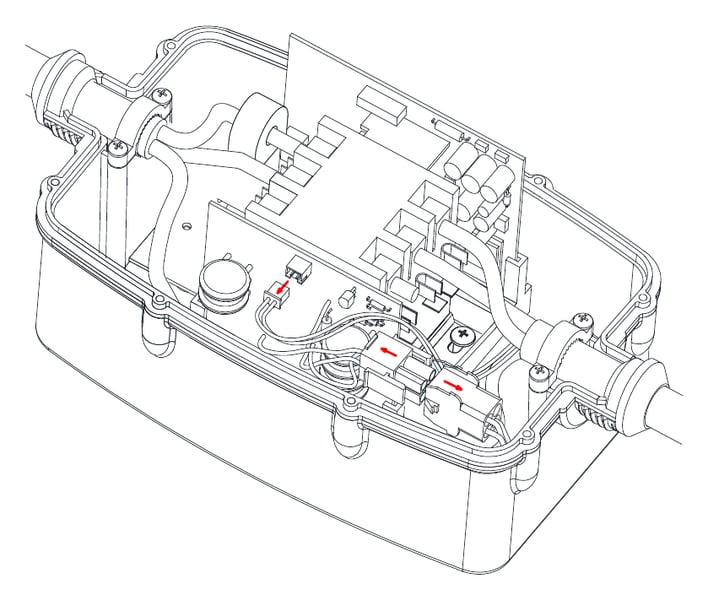
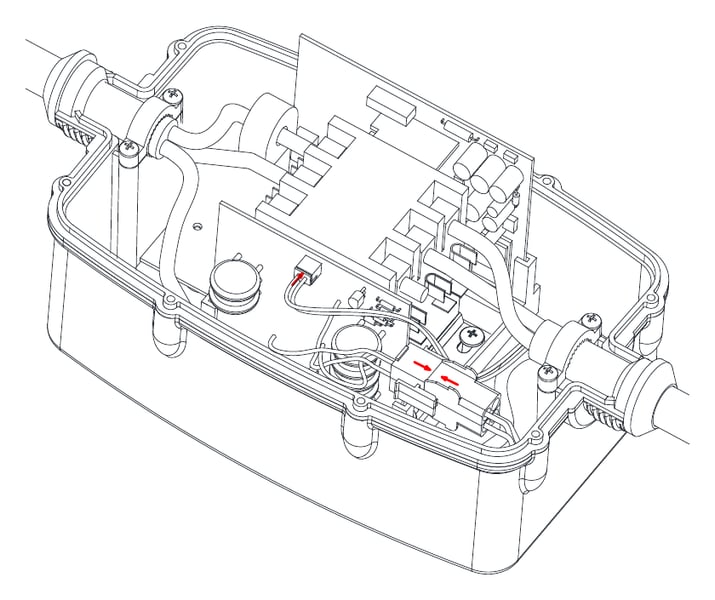
- Unclip the connections. Note where each one goes before you pull it.
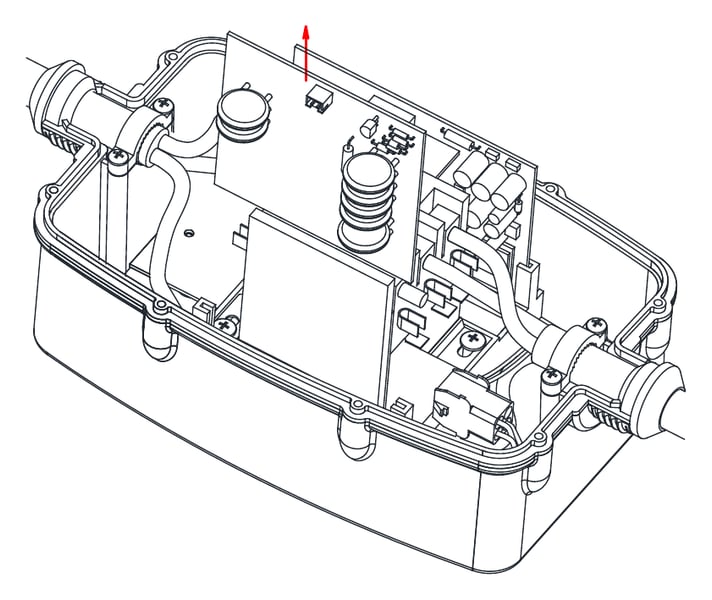
- Carefully slide out the used-up surge module.
- Slide the new module into the same slots, then clip the connections back on.
- Put the halves back together, replace all 8 screws and tighten the cable connectors.