
Connect your Gen II to WiFi
Pair over Bluetooth first, then use a 2.4 GHz network. Four steps.
The app sends your WiFi details to the Watchdog over Bluetooth. WiFi setup won’t work until the Watchdog is paired over Bluetooth.
Before you start: you need a 2.4 GHz network
The Watchdog only works with 2.4 GHz WiFi. Most combined 2.4/5 GHz networks also work, but not all. Many RV routers default to 5 GHz.
If it’s your own router, set up a separate 2.4 GHz network. It won’t slow anything down. The Watchdog sends very little data.
Step 1: Put your phone on the 2.4 GHz network
Connect your phone to the 2.4 GHz network you want the Watchdog to use.
Phones jump to the faster network on their own. If that happens, tell your phone to Forget the 5 GHz network until setup is done.
Step 2: Open WiFi Setup
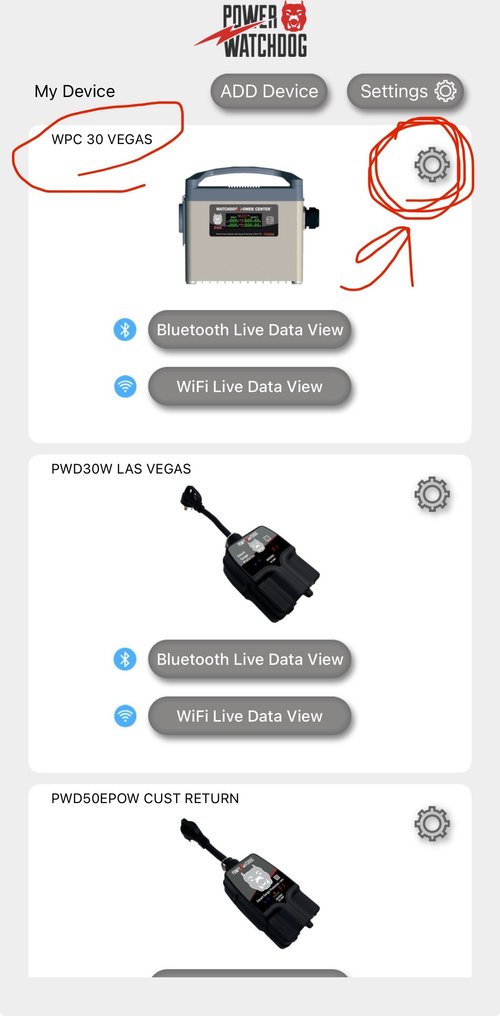
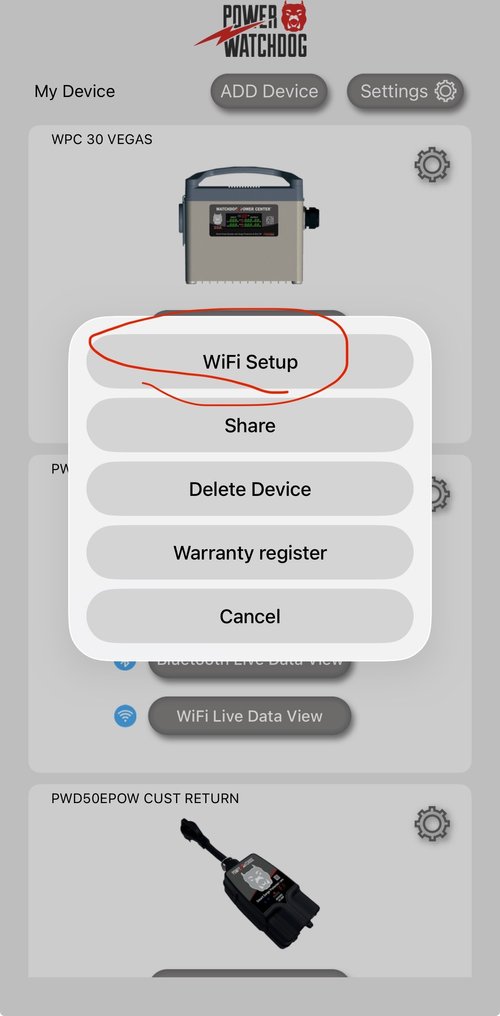
On the app’s home screen, find the box with your unit’s picture and name. Tap the gear in that box, then tap WiFi Setup.
Step 3: Check the network name
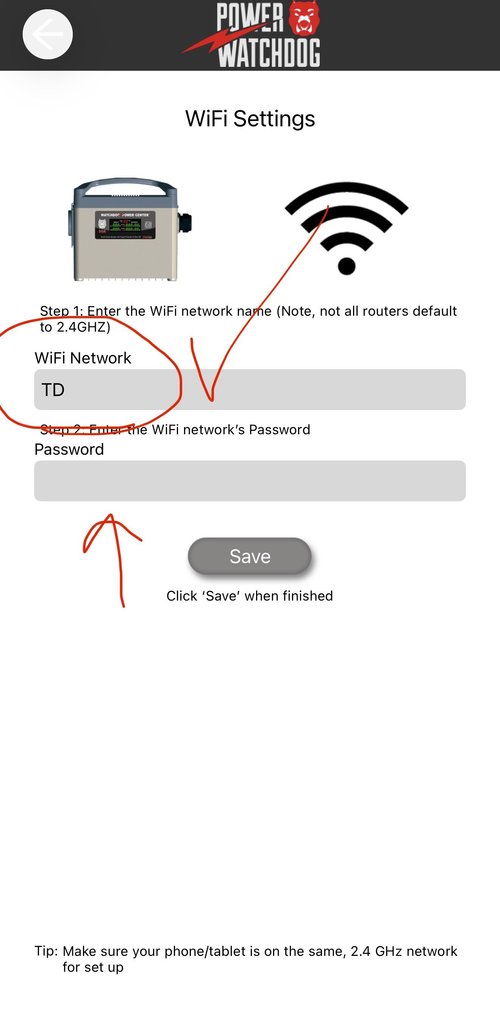
The app fills in the network name for you. Make sure it’s the 2.4 GHz one. If it shows the 5 GHz name, your phone switched back. Go back to step 1.
Step 4: Enter the WiFi password
Passwords are case-sensitive. Make sure there’s no extra space before or after it. Tap Save. On iPhone, tap the blue check mark first, then Save.
Setup takes 5–15 seconds. When it’s done, tap OK.
How to tell it worked
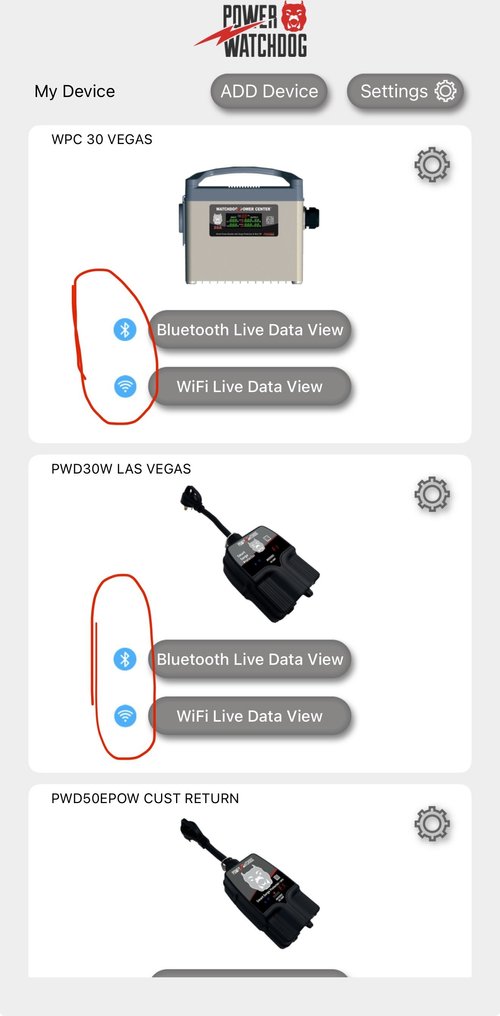
On the home screen, both the Bluetooth and WiFi live data buttons turn blue. When you walk away, Bluetooth drops off but WiFi stays blue as long as your phone has signal and the Watchdog is in WiFi range.